
DRAFT – Inventory Programs in Syncore
SOP ID: EC-002
Effective Date: 08/01/2025
Revision Date: 08/01/2025
PURPOSE
To create, and maintain an inventory program stored in Syncore.
SCOPE
Departments/Teams: Sales, Web
Locations: Syncore
Exclusions:
RESPONSIBILITIES
| Role | Responsibility |
| Sales | Make the inventory program request and provide details on products |
| Web | Create and manage the inventory program and items |
DEFINITIONS
| Term | Definition |
PROCEDURE
1.1 Request Product Class
A product class is required to house the products being offered for each client. You would also make another class for each client who has a different set of items, such as clients from the same company that may order the same item with different decoration. This also applies for every webstore inventory program, each one will need its own product class.
All requests will need to be sent to Emily or Jim for Syncore Support to setup internally. You will not be able to progress until this has been created.
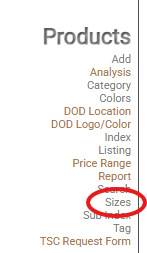
1.2 Add Program Sizes
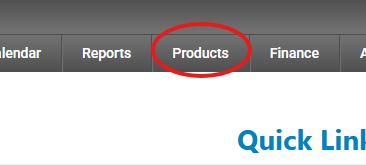
In Syncore, go to V1>Products (top menu) >Sizes (side bar menu).
You will need to select the new Product Class that was created and hit the add button. For each size, add the level, description, and abbreviation for each size. Please note that the description and abbreviation can be the same.
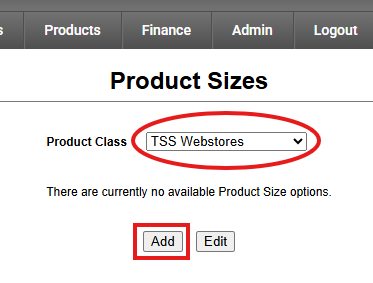
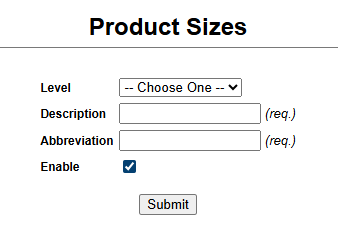
Follow this process to add every size that will come through for any product in this program. Each size will be given a unique ID number that will be used for referencing when you create your products.
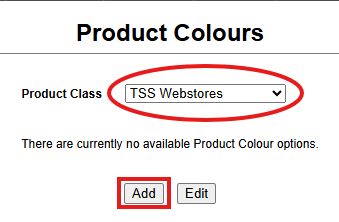
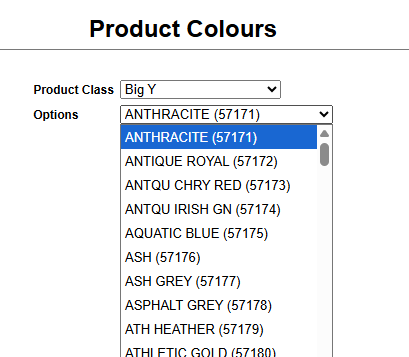
1.3 Add Program Colors
In Syncore, go to V1>Products (top menu) >Colors (side bar menu).
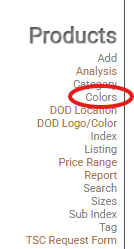
You will need to select the new Product Class that was created and hit the add button. For each color, add the description, and abbreviation just like we did for the sizes. The abbreviation should be what would show in the SKU for your item. For example, Athletic Heather could be shortened to ATH HEATH.
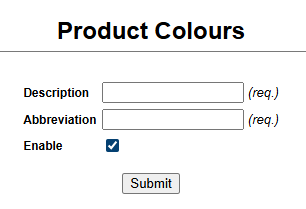
Follow this process to add every color that will come through for any product in this program. Each color will be given a unique ID number that will be used for referencing when you create your products.
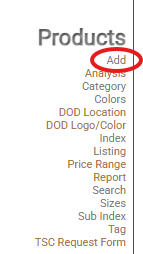
1.4 Create Products
Each product will need to be manually added to your product class. In Syncore, go to V1>Products (top menu) >Add (side bar menu).
Select your product class and go through the form for each product:
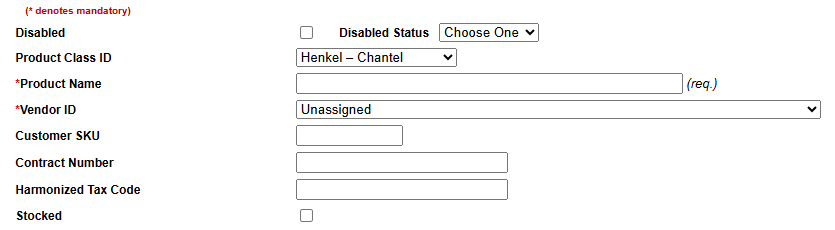
- Product Name: name of your product
- Vendor ID: the vendor
- Stocked: if this is an inventoried item, check the box

- Price Range ID: leave this as unassigned, this is an old field that is no longer used
- If you are going to be selling these items with price breaks, the grid here is how you would designate them. For no price breaks, only use the first row and set the range to “1+” to “undefined”.
- Sell: sell price for the customer
- Vendor Cost: net cost for the item
- Job Cost: this is also what affects your margins on the order, sometimes the kitting fee or other miscellaneous fees that go into a product moving through production
- Vendor SKU: item number
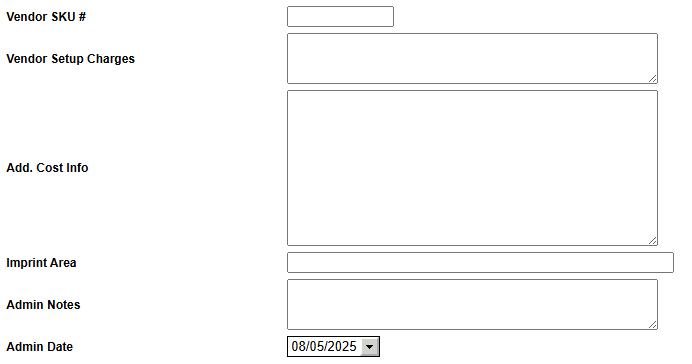
- Vendor Setup Charges: if this item is being decorated by the vendor, extra charges like setups should be detailed here
- Add. Cost Info: if the item is going to be decorated in house, use this field to detail how it is decorated such as the logo, decoration method, and transfer sizing. This should also include any special pricing that may need to be noted for future orders.
- Imprint Area: this would be a good place for the location of the decoration
Once all of this is filled out, hit save. This will create your item and you will be able to see new places to add your colors and sizes to add to the item.
1.5 Add Item Sizes and Colors
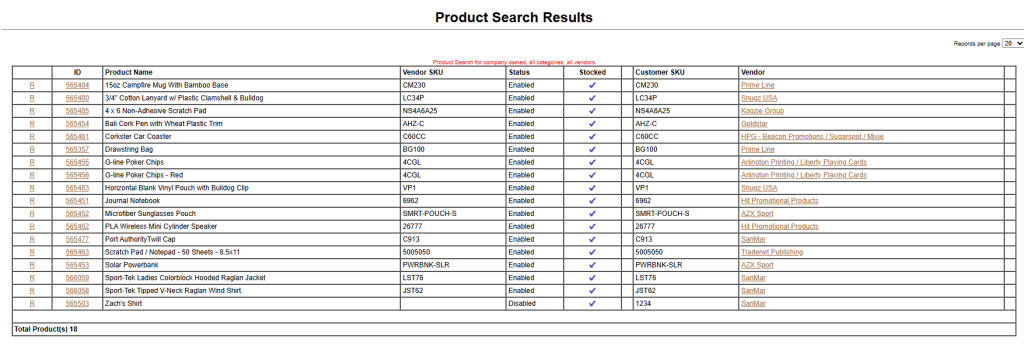
Now that all of your items have been created, go into the Product Search and select your product class.
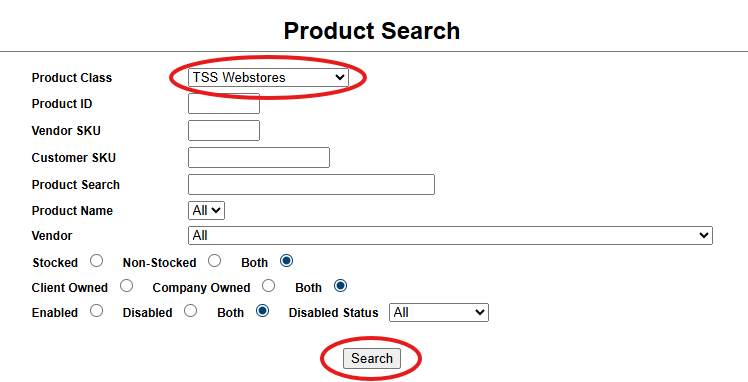
This will give you a list of all of the items that are in your product class. Click on the ID to take a look at each item.
Next to the Stocked checkbox, you will now see a link to add the colors and sizes as well as another checkbox for if the inventory is owned by the client. Please pay close attention to this as it will determine whether Triple Stitch owns the stock or the client.

When you click on the Color/Sizes/Surcharges/Min/Valuation button, you will need to select all of the colors and sizes of the item that you are looking to add to the product. This is also an opportunity to add the below information.
- Minimum: this is the minimum amount of product you want to keep in your inventory, it is also what signals when you are low on stock
- Valuations: Net garment cost + decoration + freight, without markup
- Make sure to add the location of these goods within the building (bin location and warehouse)
1.6 Add Inventory Count
The last step is to use the reconciliation report to add the initial inventory count. This is also used to reset the count if for any reason the count is off.
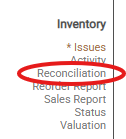
In Syncore, go to V1>Products (top menu) >Reconciliation (side bar menu).
This will show you all of the reports that have been done across all programs. It is important in this step to be descriptive in the description of the report so that there is no question to what it is for.

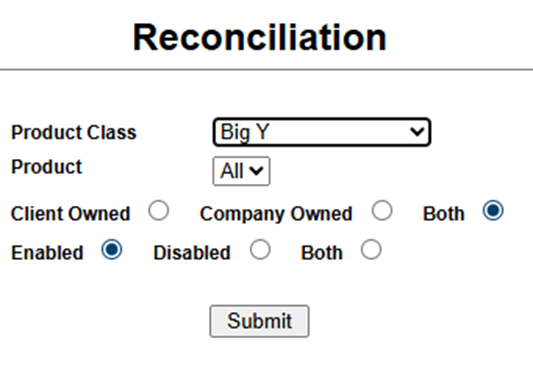
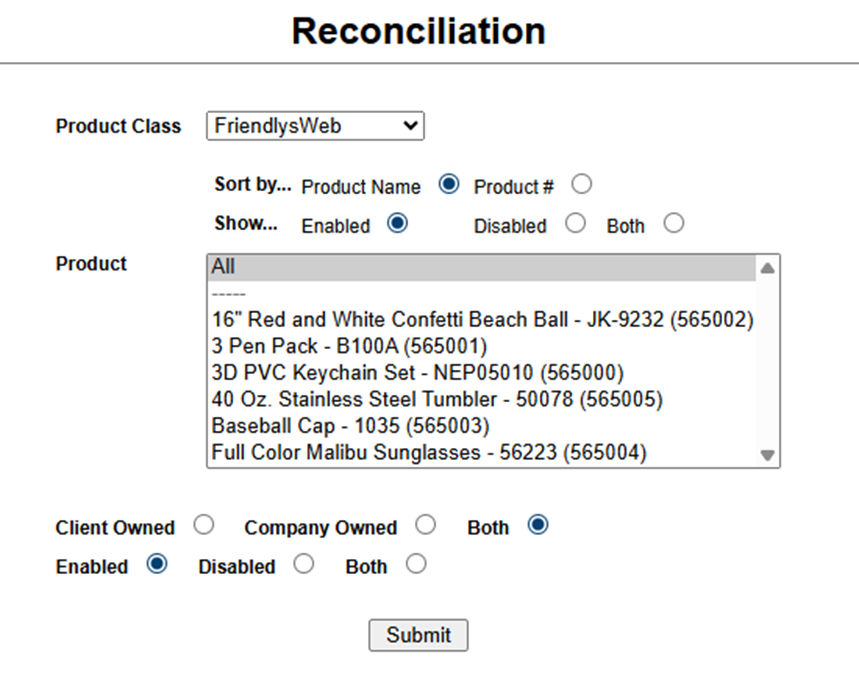
Click add to make a new report. You will need to select your new product class and make sure that you are going to see all products, including both client and company owned stock that is enabled (see left image). If this is a web program from Bright Sites, it will look a little different (see right image).
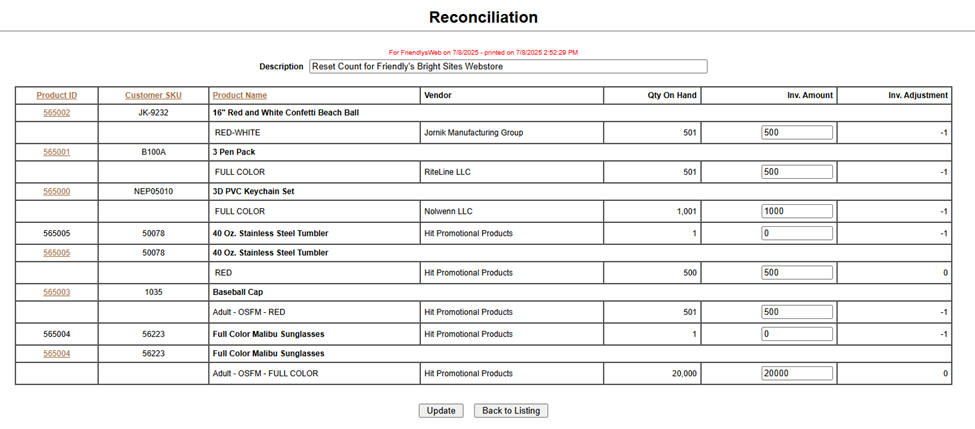
You will need to put in the Inventory amount for each item as well as a description of the report. Once you have put in the counts click on the update button below.
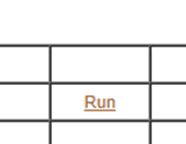
You will then be able to see the report added to the list of all of the reconciliation reports.
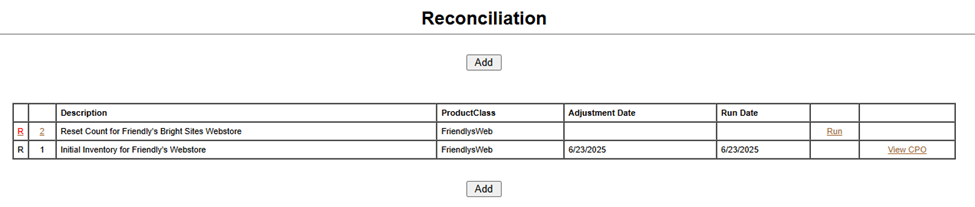
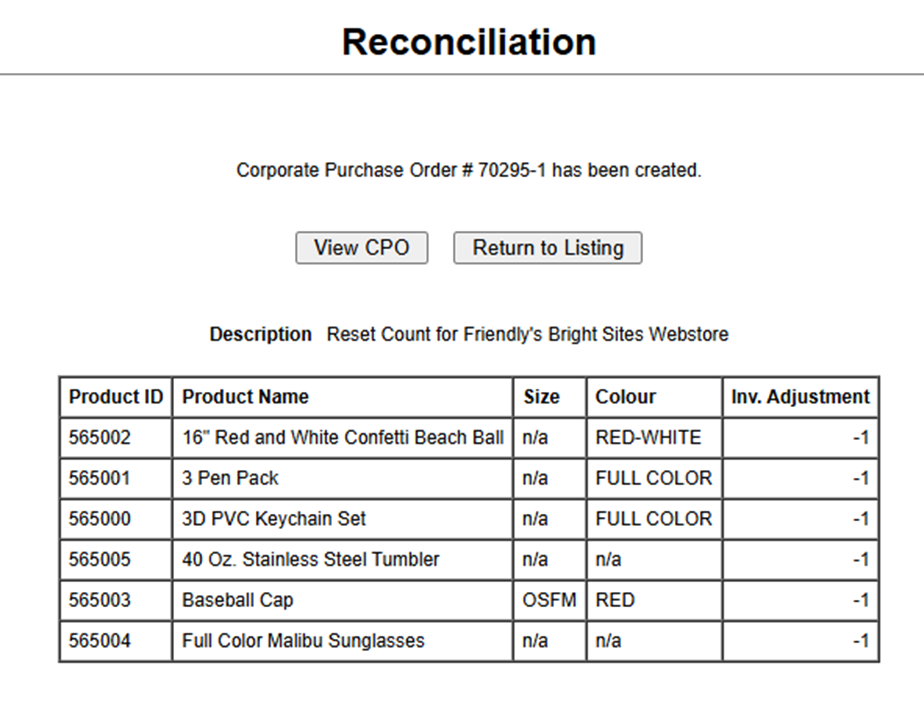
There will now be a button that says run in the row that you have added. You will need to click on that button and set the adjustment date to today.

This will create a CPO that will record any changes or initial counts to your inventory.
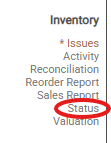
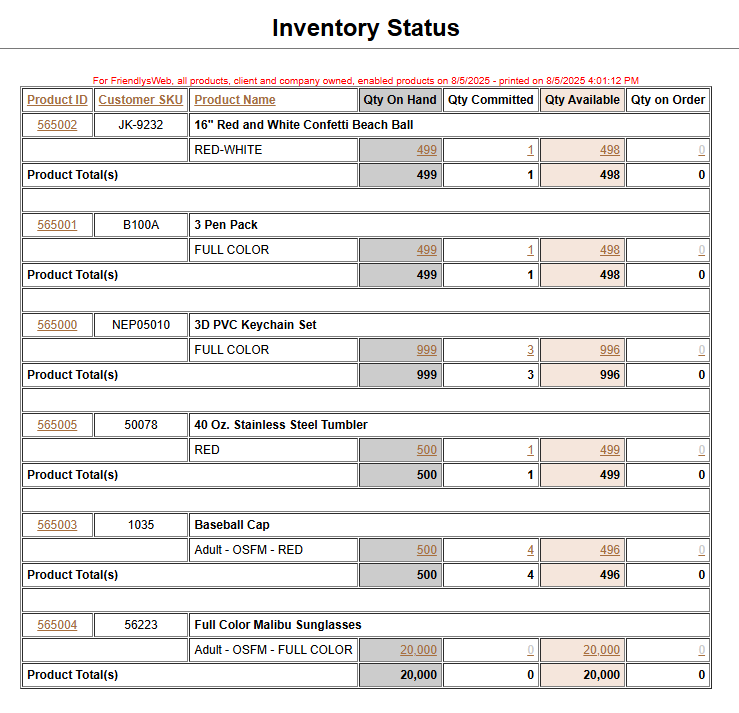
You are able to view the inventory by going to the Status from the side menu.
ATTACHMENTS
REVISION HISTORY
| Version | Date | Changes | Approved By |
| 1.0 | Initial Release |
APPROVALS
Prepared By: ___________________________ (Name/Signature/Date)
Reviewed By: ___________________________ (Name/Signature/Date)
Approved By: ___________________________ (Name/Signature/Date)
Confidentiality Notice: This document is the property of Triple Stitch and may not be duplicated without authorization.