
DRAFT – Inventory Programs in Access
SOP ID: EC-001
Effective Date: 08/01/2025
Revision Date: 08/01/2025
PURPOSE
To create, and maintain an inventory program stored in Access.
SCOPE
Departments/Teams: Sales, Web, Production
Locations: Access
Exclusions:
RESPONSIBILITIES
| Role | Responsibility |
| Sales | Make the inventory program request and provide details on products |
| Web | Create and manage the inventory program and items |
| Production | Pull stock from the inventory program for each order and keep accurate counts |
DEFINITIONS
| Term | Definition |
PROCEDURE
1.1 Request Inventory Program
The following information is required for any inventory program to be made:
- Company Name: what is the name of the company or program?
- Notifications: options may include weekly inventory reports, and/or monthly meetings. Please provide an email address if you choose to utilize either of these.
- Item IDs and Vendors: needed for looking up in SAGE.
- Item Colors: colors of the items being offered.
- Item Decoration type, logo, and color: decoration information for re-ordering.
- Net Cost and sell price: This is mostly needed if the items are going to be used on a webstore program.
- Minimum Quantity: the minimum you want to have on hand, this is also the threshold for the re-order process.
- Re-order Quantity: the amount of the product to purchase when placing a re-order, this is usually the minimum by the factory.
It is highly recommended to send this information in a spreadsheet if you have more than 2 items going into the program (see Attachment 1 for template).
1.2 Create Inventory Items and Program
Create items with unique IDs
Each item that is going into your Inventory program will need to have a unique ID number that will distinguish it from the rest of the items that are listed in Access. All items exist outside of designated programs, therefore having a unique ID makes it easy to pull the correct item from the correct inventory.
Any new item that is added to the system will need to be made twice if it doesn’t already exist in the system. One will be the default, and the other will be duplicated from that with your unique ID. This way, if there is another company that decides to get the same item, we can easily duplicate the default and customize it for that company faster.
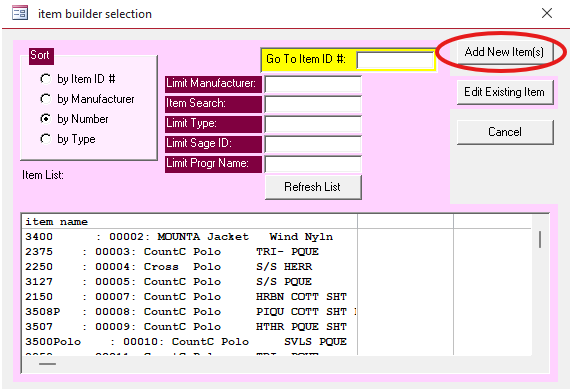
To create the default item (not assigned to a company yet) you will need to go from the Main Menu to “Maintenance and Utilities” > “Item Builder” which will bring you to the below screen. Click on Add New Item(s).
Below is an empty new item in the item builder that will need to be filled out with all of the information about the item. If you can find the item in SAGE, you can import most of the information in the SageID field in the top right corner.
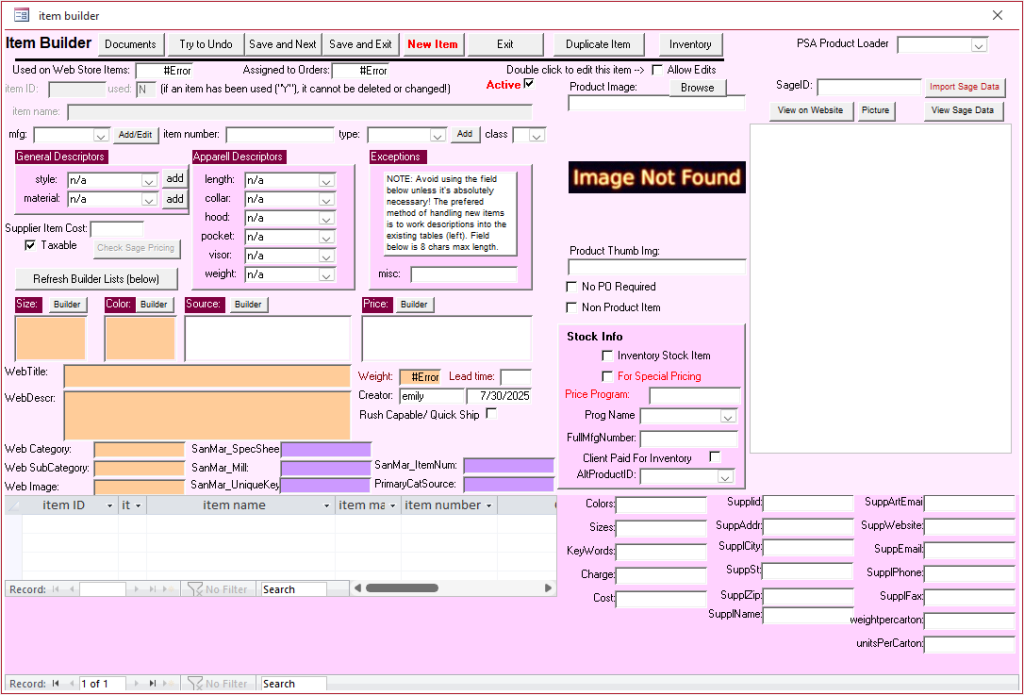
The following fields are required for an item to function properly:

- mfg: the manufacturer for the item or vendor
- item number: the ID number for the item
- type: what type of item is this? this is usually a generic umbrella term like polo or tshirt
- class: all items fall under either A for ASI or hard goods, or T for Textile which is used for items that we decorate with embroidery, heat press, or silkscreen.
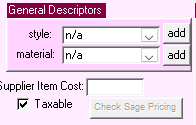
- Style and Material: these provide more details about the garment such as wicking material or made of plastic
- Supplier Item Cost: this is our net cost for the item

- Size: all available sizes for the item
- Color: all available colors for the item
- Source: the same as the manufacturer, sometimes you can add multiple sources if the same item is available at different vendors
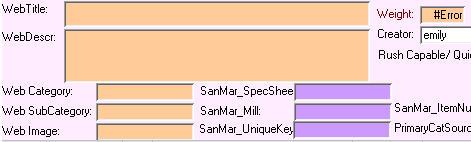
- Web Title: the name of the item
- Web Description: the description and details about the product from the vendor
- Weight: the weight of the item
- Web Image: the name of the image file which follows the format “[item number].jpg” for example 2000.jpg
Looking at the item builder for your default item, click on the button in the top right corner that says “Duplicate Item”. This will prompt you to create a new ID for a duplicate of your default item. The standard practice for this is to add “-” and the first 3 letters of the company’s name afterwards.

Please note: If the name is too long, there will be an error. The name cannot be longer than 10 characters.
Assign items to a Program
The name of your program should be the name of the company it is for, unless this is a specific subsection or event for that company. For example, Henkel and Henkel Welcome Kits.
Open one of the items in the item builder and make sure that you allow edits, this checkbox is under the Inventory and Duplicate Item buttons in the top right corner.
Look in the bottom right corner for the Stock Info section and fill out the following:
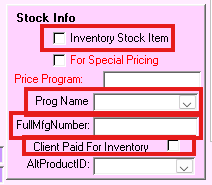
- Inventory Stock Item: this check box will tell the system that we are stocking this item.
- Program Name: the first time you type this in will be when the program is created so do not panic if you do not see the program in the list.
- Full Manufacturer Number: this is where you will put the actual ID for the item. This is useful for re-ordering because then we do not have to guess what the item is based on the unique ID that you set. This can also be updated if we need to select a different item as a substitute due to vendor stock.
- Client Paid For Inventory: this needs to be checked if the client has already paid for the stock we are holding. This affects billing back for items sold in webstores! If it is going in a webstore, this must be checked and stock must be purchased prior.
Once the information has been loaded into the system, I recommend closing the window to save your edits, then reopen the item and click the inventory button at the top right of the window to insert the item into the inventory program.

If done properly, you will see a line item for each color and size pairing for the new item. You will then be able to add inventory counts to this if the item was purchased in Syncore instead of Access.
1.3 Pull Stock on Orders
On the Main Menu, click on the Inventory Picking button located between the Inventory Management and Order Follow Up buttons.
Enter the Order number you are looking to pull stock for and all of the items to be picked for that order will show in the list.
Select each item and click on the button at the top “Set Picked Items”.
Once this is complete, refresh the list and you should see that item disappear from the list.
Please note: if an item gets double picked, it will show as a negative number needing to be picked. This will cause issues with reordering and your total count of inventory and should be fixed immediately.
1.4 Re-Order Stock
When stock is low, you can look
ATTACHMENTS
REVISION HISTORY
| Version | Date | Changes | Approved By |
| 1.0 | Initial Release |
APPROVALS
Prepared By: ___________________________ (Name/Signature/Date)
Reviewed By: ___________________________ (Name/Signature/Date)
Approved By: ___________________________ (Name/Signature/Date)
Confidentiality Notice: This document is the property of Triple Stitch and may not be duplicated without authorization.